Week 6

Jackson:

This past week we were able to mark several MODs as complete and got the documentation on the web blog. I really want to focus on documentation during this project, for everything we do to prepare ourselves we should document it so others can replicate it. With thorough documentation people can find ways to improve something without just doing the same thing we did without knowing it. Early in the week we went over the ZOOM mic and are trying to get a strong understanding of how to use them. Over the weekend we were to do some outdoors recording with the ZOOMs to understand the equipment. We were able to use the ZOOMs and practice interviewing when Elliot Kastner came in to talk to the class on Thursday. This was a great opportunity to practice interviewing and to practice it in a recording setting.

Going into the week I’m going to be working on these asana tasks:

Asa:

Last week our class was approached by Mr. Kastner. He gave us his presentation about his own independent research project which has got him where he is today. Later in the day we were lucky enough to get a 20 minute interview with him, which was a great practice/test interview that really laid the groundwork for many future interviews to come. We have been listening to the recordings and will get to edit them this week. I have been playing with the zoom mic Bill sent me home with, which is always fun. I will also be working on the Asana tasks.

0 comments

Week 3

This week we were introduced to Asana, and learned all about every step it takes to make something happen. We found all of these vocab words that H wanted us to learn, which were all about projects and project management. Our classes were cut short thanks to the hurricane. This next week we plan to create our project plan for the next two semesters.

0 comments

3D Printing Instructions


These are the instructions on how to print things using the Ultimaker 2+.

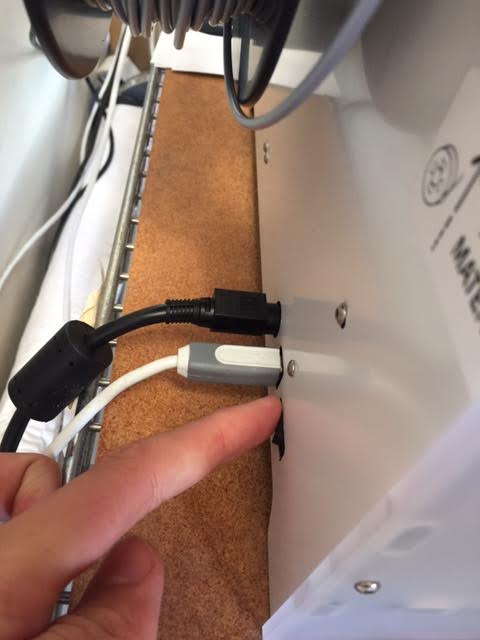
  • The first thing you need to do is switch the printer on. On the lower back of the machine, you will find the power switch. Flick that on.
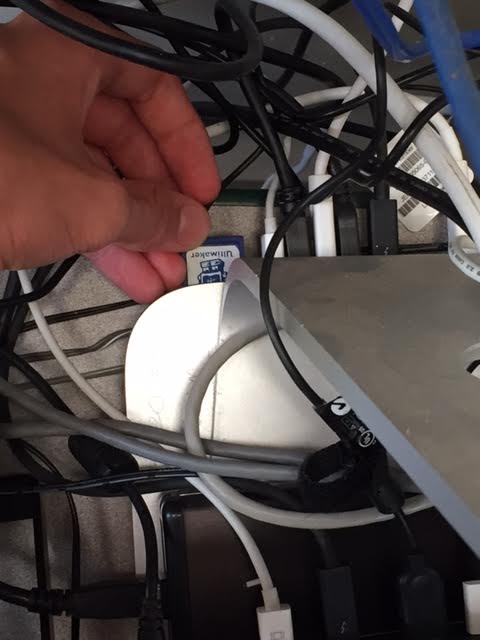
  • Get the blue SD card from the printer and plug it into the back of the Mac Mini which the computer is sitting on.(don't try to print through the USB cable, it doesn't work)


  • Find the file you want to print (This can be made on websites or downloaded for free, a good website is thingverse, and it should be an STL file)
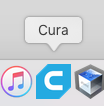
  • Once you have the STL file you will want to open the 3D printing app on this computer, named Cura
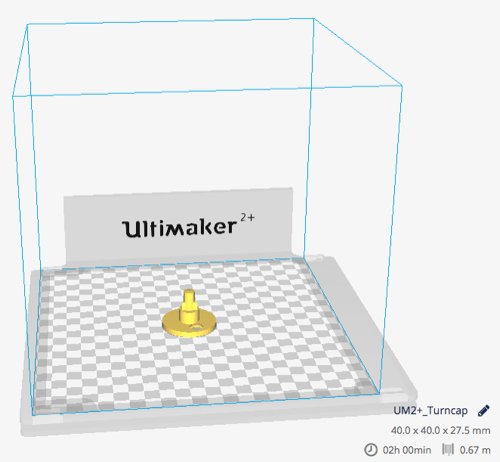
  • Drag the STL file into Cura
  • If this is a big print (which my demonstration is not) it should say "Slicing" with a little bar at the bottom right.(There are some setting controls on the right side of the window in Cura, but I find that making the print finer or denser only takes longer, and the settings it is currently on is the best for printing faster, semi stronger prints)
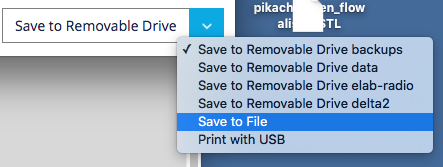
  • Once the print is finished slicing, it should say "Ready to remove to removable drive". You want to hit the scroll down arrow to the right of that bar, and select "Save to file"
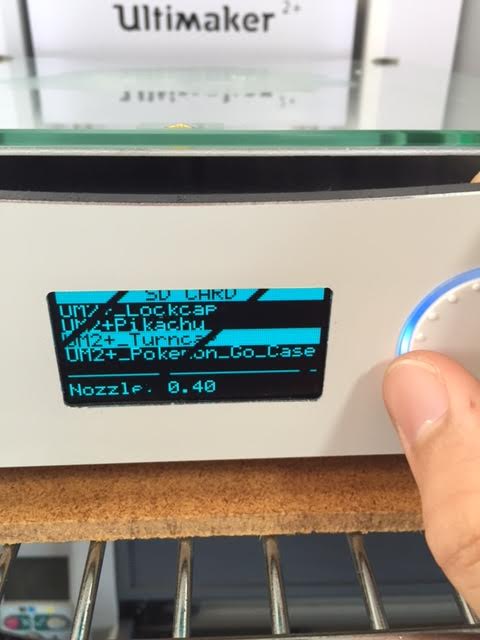
  • Click "save to file" and select to save it in the desktop so you can find it easier. The file you just made should be a ".Gcode". Select both the Gcode version of the 3d model and the stl file and drag them both into the memory card. Eject the memory card and put it back into the 3D printer, and go look into "Print". Your file should be there now, YAY!!!
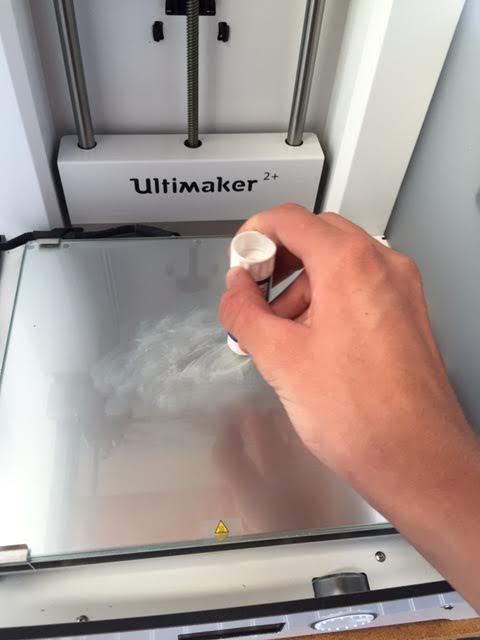
  • Before you start printing your model, you will want to put a layer of gluestick down on the glass plate. This helps by making it easier to take off the finished print.
    Please clean the glass after a print.

0 comments

7/28/16


Download file "unnamed.jpg"So a few days ago, we had a bit of a panic. The 3D printer totally messed up and flooded the compartment above the head, making a huge blob which piled out the back of the print head. It was a hardened blob which would not allow the head to go to the home base, and when the machine tried to put it back to home the blob would hit first, making this terrifying GRAABAABAA noise which could only be stopped by turning the machine off. I took off the fans which were holding the blob in place. Today we attacked the blob with metal scrapers and a heat gun, while simultaneously heating the print head, which amazingly melted the blob right off of there, falling onto a piece of paper waiting below. We were really worried about the wires the blob melted around, but they seemed pretty resistant, and the PLA dripped right off. Currently test printing a little ultimaker robot, and it seems to be working well!!

0 comments

7/21/16

Today I was replacing a lot of ram on the old I-7 macs, some of which only had about 4 gb of ram (crazy small amount). These all now have 16 gb of ram, making them race cars compared to the 2000's Dodge Neon they once were. I am putting their old Ram cards into the white mac laptops, which currently have two one gigabyte cards of ram. I also go in and clean them during the process.

0 comments

7/19/16

Today I came in a bit earlier than normal, about an hour and a half, so at about 10:30 this morning. This is mainly because of the night I had:

Woke up at 2:50 AM to meet Juan and Daniel guys to go on a Mauna Kea adventure. Walked down to the road at about 3:15 to wait for Juan. While walking down there, I missed a text saying they were going to be about 40 minutes late, so I was stuck down there until 4 AM laying on the pavement in my sleeping bag. Around 9:00 we're back in Waimea eating at the coffee place in town. I came with them to help out a big interview project with all these alumni's from years before, and about 45 minutes later we're down on the soccer field using the drone (because at the time the max wind was only about 8 mph). Sadly the whole campus was clouded over so we didn't get much to work with.

Then we came back up here, and about 20 minutes later Dr. Bill came by with the new and improved Drobo replacement called the Thunderbolt. It is about infinity times better than the old drobo, which Dr. Bill ended up throwing off of the Kawaihae dock out of frustration (jk). So we set up the new brain and then watched a bit of movies out of it, and hooked it up to the system. Now I am headed to try and work my magic on another computer from hell over in the main hall which would be more useful as a hot plate than an actual server, putting out mad heat rather than helping anyone in any physically conceivable way.

0 comments

Exit checklist

  • Check C6 and entry monitors
  • Chairs tidied
  • Empty trash
  • Email Dr. Bill
  • Final checkover

0 comments

7/18/16

So today Dr. Bill wasn't in so I took charge with my own stuff. I decided to take the monolab apple desktop (1st one on the left) apart because it was always running like mad and creating intense heat. I took the screen off and blew clouds (CLOUDS) of dust out of the two fans that had just accumulated over the years of sitting. When I put it all back together the thing was running sweet, and I believe that the bigger fan on the left was in fact stuck from the pileup of dust inside. The fan began to run like crazy, sucking air through the entire body at an intense rate, so intense that it actually was a bit of an issue. I thought that I had put the heat monitor wire back on funky, but Dr. Bill found that the problem was in the software, and after it was updated, the temp gauge was actually right. I proceeded to do this on the projecting computer in the main hall which was also having some heating issues, and it seems to be a bit better.

0 comments

First entry

Yo, this is Asa

0 comments