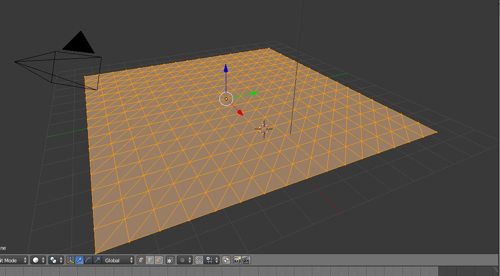
After opening blender I added a square mesh. I increased the scale and subdivided it then triangulated the surface to create more editable points that I used later to sculpt the landscape.
 After sculpting the landscape, I added icosospheres to start making assets for the environments. I started off with the trees. the icosopheres were subdivided. I added a decimate model setting to them to randomize the triangular surface to replicate the more natural look of leaves in nature. The trunk of the tree was a hexagonal based cylinder that was bend and duplicated at the end to make branches. The icosophere leaves were duplicated and re-scaled to diversify the kinds of trees on the landscape.
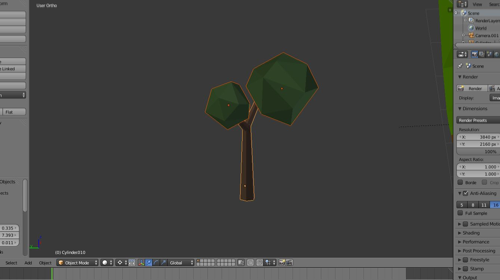 I set the assets around the landscape to establish a small forrest/tmountain environment. The triangular points where used to select certain areas that were either raised or lowered, depending on if it were a mountain or a river. I mostly worked in "edit mode" which only shows the editable points which is essentially the skeleton of my model.
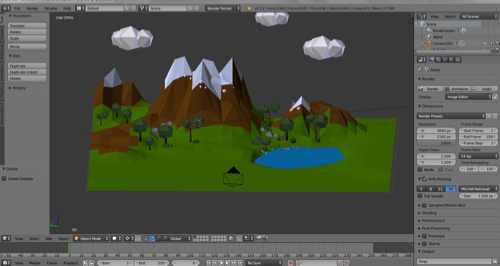
 Once finishing the basic layout to the landscape and environments, color and lighting settings needed to be added. I correlated basic colors to each part of the environment and added specific lighting settings to each color. For all the colors, i turned specular intensity to 0 so no light would refract off it. I did this for an added artistic style to the final render. These light settings will also be later applicable in unity for Oculus integration.
 The lighting settings were complete on the assets and landscape mesh. Prepping for the final render of the atmosphere (not translatable into unity) I added a spot light sun with hue and tone changes for a warmer and softer look. The atmosphere was given a blue hue to finalize the minimalist style I had intended. The water was a flat square mesh that was transparent and cast no shadow. The water will not be dynamic when imported into unity.
 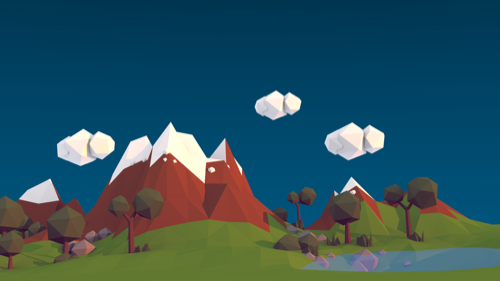 This is the final render. Sadly the beautiful lighting and atmospheric setting will not translate into unity but luckily the color/surface settings of the assets will. This environment will be later imported into unity and will be set as a solid mesh so it can be navigable. I plan to set the characters viewing settings to match the Oculus rift's stereo-graphic viewing windows.
 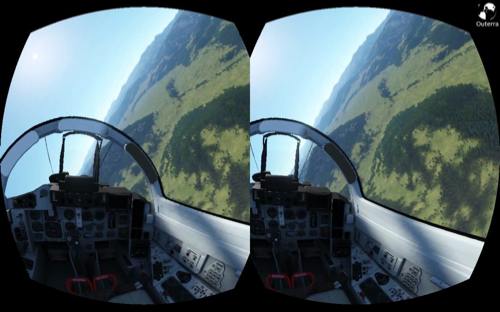 Explanation of Oculus vision
This is an example of what the Oculus Rift's stereo-graphic view looks like. the two windows simulate each eye of a person. As you can see, the left window can see more of the left side of the cock pit and the rift window can see more of the right side of the cockpit. This difference in vision is how Oculus simulates the depth of field created by the separation of the human eyes. The circular and "fish eye" shape of each viewing window is how the Oculus replicates humans peripheral vision. The special lenses the Oculus uses makes the edges of the circular windows blurry.
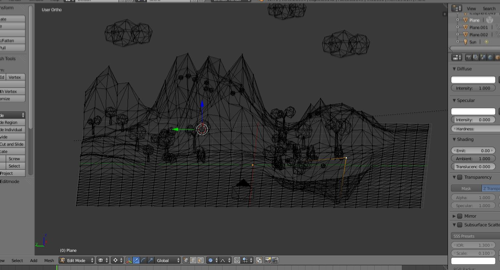
 This is my most recent model. Rather than the last landscape being only a square mesh that was textured, I worked with two cones that I set decimate settings on in order to create that rough, rock like surface. Because this mesh was so large, I triangulated the surface more in different spots depending on where I was planning to edit the most.
 You can see the differences of triangulation of the surface mesh. At these editable points I textured the ground with more detail than the larger triangular surfaces.
 This is to show the multitude of editable points that I had to work with in order to properly sculpt the river bed. The orange is what signifies the area of points I selected that I wanted to edit.
Comments