These are the instructions on how to print things using the Ultimaker 2+.
- The first thing you need to do is switch the printer on. On the lower back of the machine, you will find the power switch. Flick that on.

- Get the blue SD card from the printer and plug it into the back of the Mac Mini which the computer is sitting on.(don't try to print through the USB cable, it doesn't work)

- Find the file you want to print (This can be made on websites or downloaded for free, a good website is thingverse, and it should be an STL file)

- Once you have the STL file you will want to open the 3D printing app on this computer, named Cura

- Drag the STL file into Cura
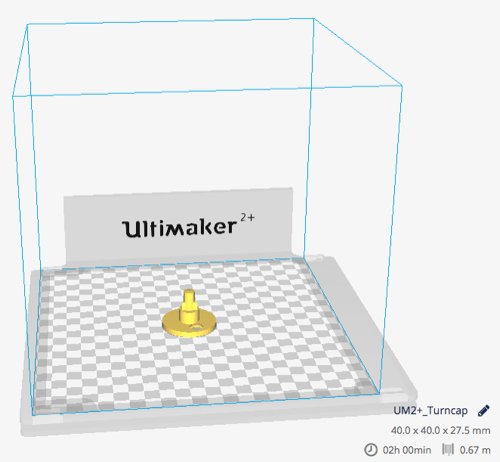
- If this is a big print (which my demonstration is not) it should say "Slicing" with a little bar at the bottom right.(There are some setting controls on the right side of the window in Cura, but I find that making the print finer or denser only takes longer, and the settings it is currently on is the best for printing faster, semi stronger prints)

- Once the print is finished slicing, it should say "Ready to remove to removable drive". You want to hit the scroll down arrow to the right of that bar, and select "Save to file"

- Click "save to file" and select to save it in the desktop so you can find it easier. The file you just made should be a ".Gcode". Select both the Gcode version of the 3d model and the stl file and drag them both into the memory card. Eject the memory card and put it back into the 3D printer, and go look into "Print". Your file should be there now, YAY!!!

- Before you start printing your model, you will want to put a layer of gluestick down on the glass plate. This helps by making it easier to take off the finished print.

Please clean the glass after a print.
Comments