ACT 4.21

WE GOT THE LCD TO WORK!!


Finally, after a few weeks IT FINALLY WORKS!


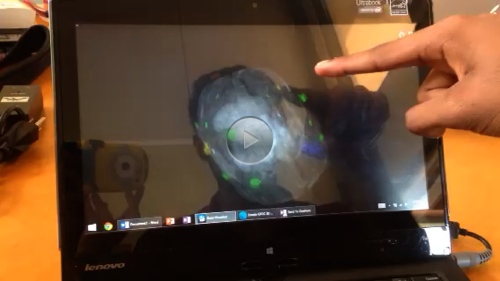
Here's a video to entertain you that shows it changing displays:


0 comments

ACT 4.14-21

I've been working on getting an LCD screen to work for the past week, and this is what I have so far:


All the wiring components are in place, but we're having trouble with getting the Arduino IDE to work.
The software requires a Java Runtime Environment to function, and even though we've downloaded Java RE 7 for OSX, the Arduino IDE is still not working, so we need to figure something else out. We're currently looking at some troubleshooting forums online, apparently we are not alone with these problems.

0 comments

ISR 4.15

Over the weekend Alina and I hunted for construction paper for our project, and she found some giant poster paper at Ace.
So here we got to work.


Air purifier boxes, cut up and ready to be taped with construction paper


Our finished color triangle!


0 comments

ISR: The Color Project


As a project for the last quarter of my time as a student here at HPA, my F period independent study brain group (Alina and Davy) and I have decided to create another study where I can give any help to them that they might encounter in future studies to my best efforts. Hopefully this will be helpful to them in their endeavors next year.

Alina thought of doing what we're calling "The Color Project" where we ask volunteers (starting with our team) to sit down and basically stare at colors for a given amount of time, and where we would study the brainwaves at the time using the same Emotiv EEG headset and software. She reminded me that a while back I expressed a similar idea when I was starting the Apples and Oranges project which proved more difficult than thought, due to excessive noise and interference which basically rendered the data almost unreadable and definitely not very conclusive.

We wanted something simple, something that could start off small but had the potential to become big, and something very realistic instead of abstract.
The Color Project enables us to do all of that. Here is an outline that Alina and I sat down to write with input from Davy.


The Color Project

Purpose: Identify the EEG brain wave patterns associated with different colors and to look for a signature pattern (possibly discover one).

Question: What are the brain wave patterns associated with red, green and purple in a relaxed state?

Equipment:

  • light box
  • colored construction paper
  • EEG emotiv headset
  • computer (3D Brain Map software)
  • saline solution

Procedure:

1.) Instruct volunteer to sit down, get comfortable with the headset, and relax for five minutes.

2.) Instruct them to close their eyes and then show each color for 15 seconds (eyes closed will allow us to have a transition between the noncontrolled environment and the controlled environment).

3.) Record the 3D visualization and the EEG graph side by side in order to provide a more complete picture of the data.


Progress as of Sunday, April 13, 2014:

So far, we've found that instead of a lightbox used for photography, a cardboard box would be more practical for us.

We figured out that taping the colored paper outside the box would prove even better than taping it inside. We're literally thinking outside the box (bad joke sorry).

I'll put up pictures in the next session to make our setup more clear.

A triangle also helps because since we're essentially cutting up cardboard boxes (Dr. Bill's filter packaging boxes) and flipping them inside out, a triangle provides much more stability than a square. Also, we're thinking of doing three colors, so it's perfect.

After further discussion, we've also decided that choosing arbitrary colors (red, green, and purple) was not the best idea and that maybe choosing primary colors or the primary colors that make up visible light might be more meaningful, especially since this is a very primary study.

The magic of this study is that if we wanted (or rather, if Davy and Alina wanted), we could essentially expand to study more people's responses to color or even more colors, how color-blind people's brainwaves respond to color, and so on. Color perception is often taken for granted, but it really is a very special thing.

I'm thinking that somewhere way in the future we might just be able to piece together a complete image of what someone is seeing in their minds by just looking at their brainwaves. No tracing eyeball movement (because that is cheating) like they do nowadays where they track where your eyes are looking at, and all the feedback they get is a bunch of squiggly lines, but actual brainwave analysis with colors and all. It is like examining what makes a pixel, and progressing from low resolution (maybe a four by four matrix), to medium and finally high resolution (HD). Color sensitivity would also go up as it has in the digital industry, and someday far far away all of this might be possible. However, now we're just going to start small and focus on single colors, and maybe we might be onto something. You never know.

0 comments

ACT 4.7


During spring break, I got my hands on a new Arduino kit of my own from China.


It has got to be one of the Holy Grails of Arduino project kits. This is the kit that has the remote (as you can see on the left of the picture), a step motor which will allow us to control items with more precision and control, a few beautiful screens, two breadboards, an Arduino Leonardo and a corresponding shield, super large buttons that could be linked with the computer to act as an external keyboard or more, an external battery and battery holder, and so much more.

It's Christmas in a box.

So now that I've introduced the kit to my fellow teammates, we're trying to find the corresponding code to each and every component we're planning on using for the final project and hope that inspiration comes to us after we have a better understanding of what the components can actually do. For example, we can figure out if we can link the remote with the motor, or if we could even connect an ethernet shield to wirelessly control things connected to the internet, and so on and that would be crucial to figuring out a feasible project.

Here's a good link I've found that shows some basic demonstrations of using the Arduino Leonardo and linking it to a computer keyboard.
http://cal-eng.com/?page_id=579

Figuring out how to control each component is the first step to creating a feasible and worthwhile project, and it shrinks down the time spent on troubleshooting and rids of many unforeseen problems.

0 comments

ACT 4.3

Today has been another day of searching for inspiration for our final Arduino project, hopefully combining every project we've done and all the interfaces and gadgets we've learned to use.
Here are a few cool links to projects I've found interesting:

A Nunchuck and servo motor controlled camera (tilt and pan, and can act as a remote to click the shutter) http://diydrones.com/profiles/blogs/705844:BlogPost:31713


An RGB Combination Door Lock:
http://hackaday.com/2008/06/12/how-to-make-an-rgb-combination-door-lock-part-1/


This is a color-code protected door lock, where instead of punching in a code to unlock the door, you will need to punch in different colors onto an LED keypad to gain access. On the practical side of this project, locking doors with color code or software that might not be reliable (faulty resistors, something wrong with the wiring) is cool, but not super useful. However, if we can make the colors blink in random patterns where a similar code is implemented and allow the responses to be recorded onto a computer, this could be a great tool for the independent brain studies going on up here as well. One of the most common things we measure for is how concentrated or how focused people are during certain situations, and tasks we've supplied in the past have included arithmetic, reading difficult literature, and plain asking participants to concentrate, but this could provide a very fair and random task that does not require much movement (which cleans up the EEG data) which validates the data we are getting to possibly EEG laboratory levels. Asking participants to solve math problems in their heads with their eyes closed has proven to be the most fair and the most readable method so far, but the skill of mental arithmetic between individuals varies greatly due to previous education, personal experiences, and genetic factors along with our independent variables whose effects on concentration we are attempting to understand. The effect that these independent variables such as nutrition and sleep have on an individual's concentration are tough to determine due to all these other factors out of our control, and therefore each individual needs to first go through baseline studies to then go through a personalized study. Generalization is tough with all these obstacles. However, punching in colors in response to certain criteria eliminates most of the biasing factors that solving math problems and reading creates, and it makes sure that participants are alert and focused whereas in math their minds might wander if the problem is deemed too difficult and the readings are deemed pretty much useless.

0 comments

April1st, 2014


With the arrival of college decisions both exciting and sad, the last quarter of high school and the last quarter in this Advanced Computer Science course begins. I cannot imagine my life without this class. Smirking while reading XKCD comics such as "sudo make me a sandwich",


or laughing while crying on the inside while reading things like this circuit diagram,


made my life so much more interesting and I'm grateful for that.

So in light of this and the sad goodbyes to come, I'm starting to visualize a final epic project to work on for the next 52 days.
We have so much equipment here available, such as the accelerometer we haven't gotten working yet and infrared motion sensors, and more from an Arduino gift kit from my dad that includes an infrared REMOTE CONTROL and I believe a mini monitor screen, servo motors, and so much more. It would behoove me to use this amazing collection of items to create something awesome as a thank-you, so here I go.

I'm still in the planning stage, but I'm thinking definitely using the remote control, servo motors, our touch sensor (YAY!), accelerometers (we must make good use of them), possibly a screen, lots of programming (speaking of which I need to brush up my skills), and etc.

0 comments

ACT Quarter 3 Summary

Quarter three has been a period of exciting independent projects for the Advanced Computer Science class. We split up into groups according to the type of gadgets we were interested in working with: Raspberry Pi, Phidgets, and Arduino.

I worked on Arduino with Hannah, Luigi, Bo, Manuel, and Mickie, and you can find their blogs by clicking on their names.

I mostly collaborated with Mickie on our Arduino projects, and we started without any previous knowledge of Arduino whatsoever, but now after numerous failures and several successes, we've become more knowledgeable not just on how the entire Arduino system works, but also on building real-life circuits, getting familiar with circuit components, and using code.

We started out with the basics: making a single LED lightbulb blink and fade, then we moved on to making a whole array of six LED lightbulbs blink in any pattern we desired, an infra-red motion detector/alarm, getting readings from a simple gyroscope, instantly communicating between computers using terminal and an ethernet shield, attempting to create a self-stabilizing platform, a gyro-controlled Minion figurine, and a touch sensor.

Some highlights of the quarter:


Our gyroscope controlled Minion paper craft from the movie "Despicable Me"Our gyroscope controlled Minion paper craft from the movie "Despicable Me" above.


Our flashing LED array, programmed to blink in this certain pattern above.


The gyroscope setup


And of course, our proudest project yet,


Behold the Touch Sensor for Arduino!


Although it sounds very simple, we spent over a month on just creating the touch sensor, and many of the projects required us to go out and find the parts we needed, which took a long time. The inductor and accelerometer, for the touch sensor and the electronic self-stabilizing platform, took most of our waiting time, and slowed down our progress, but thanks to Dr. Bill helping us locate and obtain these precious inductors, we finally got it working. The accelerometer is still being tested.


We encountered many such problems, mostly newbie problems such as figuring out which resistors to use and reading the different color codes, where each pin goes in the circuit board, and many others. However, along this little over two month journey, we've all gained a tremendous amount of knowledge, experience, and insight into computer science, electrical engineering, and problem solving in general. For example, before this we would have never understood what an inductor did nor would we have the need to understand this, but because we created a touch sensor that utilized capacitors and this inductor, which is also known as a choke or coil, and since we were so amazed that this array of electronic parts could create a whole that performed such actions, we decided to investigate further and that provoked this learning. Real life applications always make traditional in-class learning seem much easier (even AP Physics), but they also emphasize the importance of this traditional learning while reminding you that the real world is not always perfect, and creative thinking holds the solutions to most of these problems. Even after just this one quarter of independent Arduino projects, I feel much more prepared and confident for whatever might lie ahead of me in my college pursuits and post-college pursuits, both academically, practically, and even mentally.

0 comments

ACT 3.5

WE GOT OUR INDUCTOR!
This link provides a more straightforward diagram of the circuit board:
http://www.instructables.com/id/Calm-Relaxed-Interaction-Plant-Plus-1/?ALLSTEPS

Link to the demo video in case the video in the original instructable link(http://www.instructables.com/id/Touche-for-Arduino-Advanced-touch-sensing/?ALLSTEPS) doesn't work:
http://player.vimeo.com/video/43106290?byline=0&portrait=0&color=ffffff


Now for the real deal.

We assembled and rechecked all the parts in our circuit, and voila!
The touch sensor WORKS!!!


Here is a video of the touch sensor in action:


We set the touch sensor to understand when there is no contact being established, when there is a "touch", which is when Mickie touches the jumper wire that is supposed to connect to the object. Then we set the third level of sensing, "grab" as when one person touches the wire and touches a laptop with the other hand. This is where the fun comes in, and we found that when either one of us made contact with my computer, the change was small, but when we made contact with Mickie's computer, the one running the Arduino, the drop in current was drastic.

We actually got this to work, and this could mean that we could use capacitative touch sensing to even start controlling items for convenience and fun.

0 comments

ISR 2.28


Today I worked with Alina to get some readings to kickstart her project on the correlation between nutrition and brain activity levels when reading and solving math problems with eyes closed. We filled out the pre-recording survey she made, answering questions such as "how many hours of sleep did you get last night?" or "how long has it been since you last ate?" , then we proceeded to record her brainwaves.

I created a list of math problems for her to do, this time consisting only of multiplication and division, to represent a person's ability to concentrate on problem solving from their brainwaves at the given period of time. These math problems were pretty challenging, since Alina is very good at simple math, and so I created this challenging list to really make her focus. Typical difficulties included 67*3, 765/9, with simpler problems thrown in so she wouldn't despair, such as 63/9 or 42/6. She is best at division, solving typically tough problems like 765/9 within 3 or 4 seconds, and takes a little longer with multiplication.

We also studied her brain activity while she read Faulkner's As I Lay Dying (does it really mess up your mind? We'll find out).

Then it was my turn, and I performed similar tasks in the same amount of time, reading Faulkner and really visualizing the images that jumped out of Darl's narration around page 157.


Next time we'll figure out roughly what our brain activity levels looked like, solving math problems and reading Faulkner while running on lasagna and 6.5 hours of sleep.

0 comments

ACT 2.28

0 comments

ACT 2.26

We spent all morning trying to find code that effectively reads the accelerometer values.
It was much harder than we thought, but we did find code that worked. Following instructions here seemed to work best so far:
http://www.seeedstudio.com/wiki/Grove_-_3-Axis_Digital_Accelerometer(±16g)

However, even though we could see the data set from the Serial Monitor, we were not getting any values but 0 for either x, y, or z.

0 comments

ACT 2.24

Our accelerometer arrived!


Here are some libraries and more code for the accelerometer:
Download file "Gyroscope_Arduino_10.ino"

In the lib_grove_acclerometer-master
Download file "accel.c"Download file "accel.h"Download file "README.md"


Download file "gyro and servo.txt"


0 comments

ACT 2.19

After much grief and many trips to RadioShack as well as Ace, we still don't have that cursed inductor.
We've been trying to look for alternatives online, we've downloaded all the code, everything else in the package is wired up and ready to go, EXCEPT THE INDUCTOR.
It has been ruining our lives.
We will probably have to buy one online, although we'd really rather not buy anything more, this seems like our only option. The last frontier to our touch sensing Arduino project.

Other things we've been looking at:
http://www.instructables.com/id/Secret-Knock-Detecting-Door-Lock/?ALLSTEPS

0 comments

ACT 2.17

We have had trouble differentiating between the different resistors, so here we will dedicate some space to showing the different color codes of our resistors:

Here is the 10k


Here is the 1M:


And here is the 3.3k


0 comments

ACT 2.14


After assembling the parts we've painstakingly collected, and after overcoming all the problems of a missing shield and the trauma of missing parts (the diodes were in our kit one day and disappeared the other), we realized that there is still one missing piece.


An inductor.

Personally, I prefer the black 103J one, since it is much smaller, and much more convenient to attach to our circuit.
Looks like another trip to RadioShack, or some wire coiling DIY, which is an option I'm hoping we won't have to use, since it will be much messier and has a higher possibility of not functioning as accurately.

After obtaining this, we can finally see some results!

0 comments

ISR 2.13

We got a new headset!!


We're really excited about our new headset that just arrived yesterday, and one of our fellow Energy Lab ISR person Justin had to get in on the fun as well.

Dr. Bill then introduced us to a label machine, and so today became double Christmas for us as we labeled the headsets and USB dongles with joy.

Everything in life seems more organized and sleek when you have labels like these.
There goes my Christmas wish list:
-An automatic label printer
The labeling continues next time.

0 comments

ISR-brainwave visualization


For the past few sessions, Davy, Alina, and I worked on the new 3D brainwave visualization software and brainstormed ideas for projects closely related to it.
We looked at all three of our brainwaves, and so far we already found that both me and Alina tend to have more activity on the left hemisphere, whether we are listening to a music clip or writing our names with our non dominant hand.


The video below is of Alina writing her name with her left hand.


And here is one of the brainwave representation on the screen:


And here are a few pictures showing our setup for the sessions:


So far, the software does not include any recording tools, and Davy hasn't been able to find a good screen recording application on his computer yet, so we have only been able to record with mobile phones and just watch it happen.

The application is fairly simple in that it doesn't have many controls or commands. It allows you to toggle with the frequencies you want to be shown, delta, theta, alpha, and beta, and allows you to select if you want only a specific frequency to be shown on the screen. This is good if you are targeting a certain frequency level of a wave, maybe for biofeedback purposes, but not if you are trying to look at the big picture of brain activity. We tend to keep all of them on for best results.

How I wish I had this last year! It makes me sad, but happy that I get to use this before I leave.

We could use this to look at sleep, measure concentration, maybe showing participants both familiar and unfamiliar pictures of items and gauging their responses to figure out maybe a signature brain response, so in the future, we could show them previously not seen pictures and gauge their familiarity with the items in the picture, and possibly know if they are familiar with it or not. For example, we could show our participant a picture of an iPhone, and if they own an iPhone I would predict that they would have less of a response, and maybe some activity in the areas of the brain where long-term memories are stored and retrieved. Then the unfamiliar stimulus, maybe a Chinese character, could be predicted to show more of a response since the brain has to make sense of this new stimulus.

0 comments

ACT 2.10


So I found the capacitors at RadioShack this weekend and brought in some crafting wires from home. It might work for the coil.
However, we wanted to make the gyroscope controlled servo motor more fun before we moved on, so I also brought in this little guy.

I printed and assembled a paper craft minion reinforced with cardboard, and put the horrified minion over the micro servo, so when we controlled the gyro, the minion would move with it.
I had to keep reinforcing the glue on the minion since the servo motor kept breaking the seams apart, and after sticky fingers and lots of glue, the minion held and we had a moving minion!

Mickie's hand is in the background controlling the gyro which in turn controls the motor.
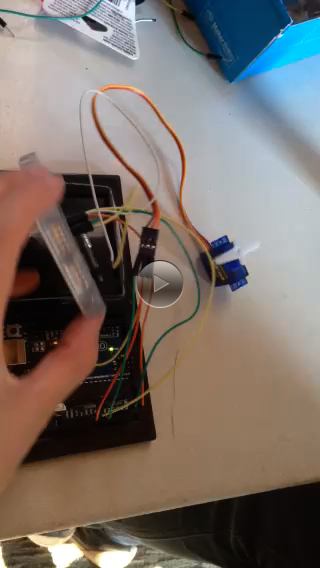

Here's what the servo looks like without the minion on it:
The rotating of the small plastic blade moved the minion in the video above.


We ran out of time to assemble the Touch Sensing board, and we seem to be missing a shield as well, but we're thinking of just using a breadboard and connecting the parts to the Arduino Uno instead. I'm excited for this next project.

In the mean time, here's another video of my moving minion to end this post!


0 comments

ACT 2.6

Here is our checklist so far, and the ### are comments which means we've found those components.

From the website previously mentioned, on the Touche for Arduino: Advanced touch sensing Instructable:

To make the shield for Arduino you will need the following components:
  • ###Arduino
  • ###Usb cable
  • Shield
  • ###pin headers
  • ###Resistor: ###10k, ###1MOmh, ###3.3k
  • Capacitor: 100pf, 10nf
  • ###Diode: 1N4148 diode
  • Coil / inductor: 10mH (cypax.dk part no: 07.055.0510)
  • ###Water bottle as sensing object.
So it looks like we are only missing the two capacitors, and a coil.
We can roll our own coil/inductor, and here we can calculate the length of wire needed with an inductance of 10,000 uH.
I wonder if regular wire from a craft store can work, and if so we could start the process much faster.
The Instructable recommends using a leftover toilet paper roll, but I'm thinking an already coiled wire (such as the one below) might do the trick. That would be nice, so we wouldn't have to do the coiling, and many craft stores sell them in this manner. It would also be cleaner and more pleasant to look at.


Mickie also got a servo motor controlled by a gyroscope working, and I'm thinking it would be cool to put a figurine over the servo, so the entire figurine could move while controlled by the gyroscope.


I'll bring in one next class.
I'm excited!


More useful links:

0 comments