Blog

ISR 2/27/24

I finished up my video today by adding some clips of my final product. I also filmed the clips. Next class, I will fix any details on my final capstone product that need fixing. I don't need anything at the moment. Attached is my video. 1212296840179994624

0 comments

ISR 2/19/24

Today I dabbled in my code a little bit. It frustrated me so I took a break and moved onto a form that I had to fill out for NHS. Next class I am going to test my edited code (if it doesn't work I might cry). I won't be in class on Friday. Dr. Bill, please bring a helmet!!!

0 comments

ISR 1/9/24

Today I started researching my capstone idea. Dr. Bill helped me build off of the idea I originally had. This class I spent figuring out the basics of what my idea is going to require time/material wise. If you are reading this Dr. Bill please assist me through this so I can spend as little time as possible fooling around with things and trying to figure them out. Capstone is due in March so I have to hustle.

0 comments

4/18/23

I finished my last kit today and then messed around with X-plane with the time I had left in class. I'm not sure what my plan is for next class. I will figure that out when I get there.
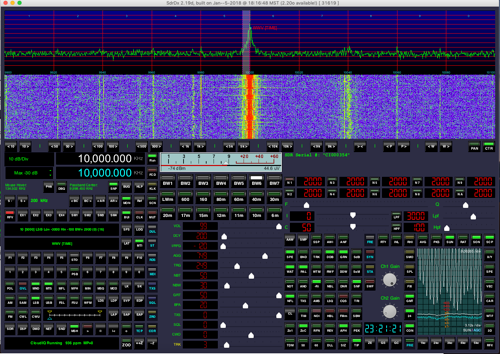
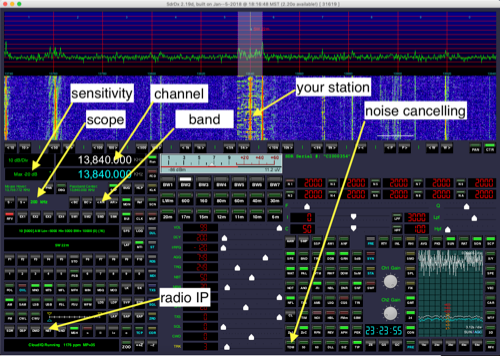
0 comments

4/20/23

Today Molly came up to Elab and was interested in what I was doing so I showed her how to solder and had her start her own kit. I then showed her around the Elab and the short cut down the hill because she never visits Elab. Next class I will probably finish helping Molly with her kit.

0 comments

4/25/23

Today I helped Molly finish up the project we started last class, afterwards we went to watch capstones. I dont know what I want to do next class so I'll have to figure that out. I'll probably work on my capstone.

0 comments

3/10/23

Last class, I started the radio soldering project. I didn't get very far in it because I was spacing out apparently and soldered some of the pieces in backwards. I fixed those and hopefully I can get most of the project done next class before spring break starts.
Download file "IMG_9201.HEIC"

0 comments

Seismic notes

Seismic notes

Download file "Seismic notes.pdf"

Why seismic sensors:

  • really cool way to see what is going on inside the earth
  • tell folks about an earthquake before it is felt here (!)
  • understand how seismic and tsunami systems work

What you will need:

  • computer with internet access
  • java installed (see below)


We have several levels of seismic sensors available to us:

  1. our own shakenet network of computers around the island and world
  2. our own hosting of the Pacific Tsunami Warning Center (PTWC) sensor
  3. our access to the Pacific Tsunami Warning Network (PTWN)

Let’s start with the simple one:
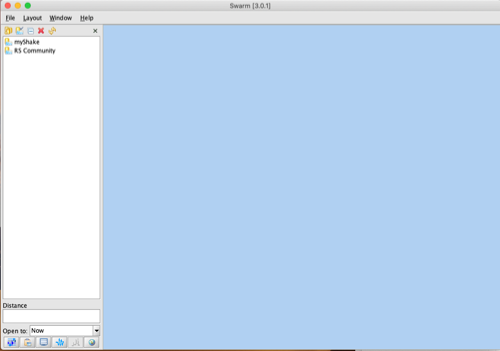

Module 1: Shakenet

  1. Go to https://shakenet.raspberryshake.org
  2. look around the planet for sensors
  3. go to 10.14.8.10, one of our own sensors
  4. note what you see
  5. note also “swarm download” at the bottom
  6. download swarm


Module 2: Swarm

  1. You can either use the version of swarm downloaded (3.1) or the newer one here: https://volcanoes.usgs.gov/software/swarm/download.shtml
  2. either way, download the compressed folder, which will then expand for you
  3. rename it swarm and put it someplace handy, on the macs, this might be the Applications folder
  4. Mac users will open terminal, and type the following: cd /Applications/swarm
  5. type ls
  6. you should see something named swarm.sh in the folder
  7. in the terminal, type the following: sudo chmod u+x swarm.sh
  8. type ./swarm.sh
  9. If there is no java installed, go here: https://www.java.com/en/download/ to install it on your computer
  10. if you were successful, you should see something like this:


  1. in the upper left, find the “new data source” window and add the following:


  1. click on the new source in the window and look for HPAH, this is the HPA seismic sensor
  2. watch as it downloads all of the seismic data from the past few days
  3. play with the controls, and take a screenshot for your notes

0 comments

Raspberry Pi Buster notes

Raspberry Pi Debian Buster basics

Download file "Raspberry Pi Debian Buster basics.pdf"

What you will need:

  • computer of some sort with a terminal application
  • internet connection on the local area network
  • permission from the owners of the computers you are working on
  • permission from the system admin (Dr. Bill) to do this, at a specific time and place (so our intrusion detection system does not block you)

Module 1: first steps (see notes below)

  1. download a terminal app
  2. test the app by using the ping command to 10.14.0.1, the HPA router
  3. record the ping time in your notes
  4. ping your raspberry pi unit at the IP address given you
  5. ping the other units, record your results

Module 2: SSH

  1. secure shell is a means of securely accessing the command line (“terminal”) of a computer
  2. use the command ssh 10.14.88.x to reach your raspberry pi
  3. you should be “in” your pi unit now, look at the prompt
  4. from that prompt, try the ping command as you did before to the other pi units, record your results

Module 3: commands

  1. from your ssh terminal, type pwd, which shows the path you are now located at, record this
  2. try the ls command, this lists the files near you in the current directory
  3. try the cd .. command, which should take you up one directory, repeat pwd and notice the difference.
  4. cd back to the directory you were first in, likely it is /home/pi

Module 4: nomachine (if no desktop access)

  1. install nomachine on your laptop
  2. connect to your pi unit
  3. right click to see the directory or file system
  4. find the folder “pi”
  5. go back to your ssh terminal and type ls in various directories, verify that they show up the same way in the folder window

Module 5: nano text editor

  1. from your ssh window, in the pi directory, type: sudo nano test
  2. type some stuff
  3. hold control while typing the o key and return
  4. hold control while typing the x key and return
  5. you have just created a document in the folder, find it on the nomachine window

Module 6: what’s going on? who?

  1. try these commands: top, ps, who, last, history, record your results
  2. try these commands: traceroute, ifconfig, record your results

Module 7: commands, modifiers

  1. from your ssh window, try using the secret version of ls: ls -la
  2. note that all commands can have modifiers, like ls -la, l means long, a means all files
  3. try creating a new file with nano, and name it something with a period in front
  4. see if it shows up in the file manager window
  5. see if it shows up using ls -la

Module 8: creating directories

  1. using your ssh window, enter the command mkdir followed by some name
  2. watch what happens in the file manager window
  3. create a text document in this new folder
  4. look up the cp, mv and rm commands using man cp and so on

Module 9: update your computer, install apps

  1. using the sudo apt-get update command, update your computer
  2. use the sudo apt-get upgrade to upgrade the computer
  3. use the sudo apt-get install hardinfo -y to install hardinfo
  4. type hardinfo and record your results
  5. install the wavemon program the same way, test and record

Module 10: control x and control z

  1. control x means stop
  2. control z means halt, no nice manners
  3. try this with ifconfig to determine your IP addresses (wired and wireless)


More complete notes:


Module 1: Terminal first steps

Using terminal on the raspberry pi:

Start with ping:

ping sends a data packet to a machine on the internet, and tells you how long it takes to return, like sonar

try pinging 10.14.0.1 Time listed will be in milliseconds, so 1000 ms means one second

ping www.apple.com

Notice different ping times

Stopping stuff:

ctrl-c means cancel

ctrl-z means halt (stop everything, not gracefully)

Tracing around the internet:

traceroute www.apple.com (note hops and delays)

Evil stuff: ping flood attack:

ping flood, only use here as a test

sudo ping -f (notice that you have to use sudo, which means "superuser do" or treat me like computer god for this)

What's going on in your terminal:

who also whoami

last last command, also the up arrow

top lists all processes, useful with kill (see later)

history: shows recent commands like this, useful for retracing your steps or seeing who might have been in your machine:

1 ping 10.14.0.1

2 ping www.hpa.edu

3 traceroute

4 traceroute www.hpa.edu

5 ifconfig

6 ping 10.14.252.22

7 sudo ping -f 10.14.252.22

8 last

9 who

10 ping 10.14.252.47

11 history

12 ssh pi@10.14.252.47

13 netstat

14 man netstat

15 man ping

16 history

navigation commands:

cd change directory, usually followed by a directory name, like "cd var/www/html/"

ls list directory, see also ls -l which lists all files in long form. Try also ls -lh *human long form"

ls -la lists even invisible files (the -a flag means "all") You can also hide files by adding . to the beginning

pwd print working directory, shows where you are in the file system (directory)


Try navigating to the desktop this way:

pwd (print working directory, "where am I")

ls (shows what is at this level)

cd or cd .. (cd to a directory, cd .. means one level up)

Here is where your desktop is: /home/pi/Desktop

Shortcut:

cd /home/pi/Desktop

try ls and see what is there, should be nothing.

Creating a directory:

mkdir creates a directory

mkdir test

This should create a folder on your desktop called "test"

click on this to see a directory browser, go nuts

Permissions

ls -la will show you permissions in the format drwx, for directory, read, write and execute

read is 1, write is 2, execute is 4, so all added up 1+2+4 =7

chmod change "mod" or permissions of file, 777 is everything, see drwx format below and the 421 rule

You may also find this under chmod u+x on a file, which means make the file or program executable

Manual pages:

man pages are manual pages, so "man ping" would give you manual pages on the ping command

less means look into a file (contrast with "more")

* means wild card, so if you want to see all files ending in jpg, you would say *.jpg

Secure shell login:

ssh means secure shell login, like ssh pi@10.14.252.2


Mac specific commands:

fsck -yf after command-s startup (single user mode)

say command after ssh login

Module 2: wild cards, man pages, deleting files

This is how wild cards work:

Instead of typing out herobrine, you could type

h*

just make sure that nothing else matches the h part.

Another example:

These files are in a folder called test:

malcolm mary tom

if you type

rm m*

it will delete mary and malcolm

if you type

rm mal*

it will delete only malcom

if you type

rm *

it will remove everything.

You can also use this to delete certain types of files (jpg, txt, mp4)

rm *.jpg

will remove every jpg file in the folder


Now you try it:


  1. open terminal
  2. navigate to your desktop (remember, it is called Desktop)
  3. create a folder using mkdir called test
  4. navigate into that folder
  5. create three text files using sudo nano, the first will be called malcolm, then mary, then tom
  6. read each one using less or more
  7. take a screenshot of this folder from the gui (graphical user interface), command-3 takes a screen shot, command-4 is a screenshot of only what you select.
  8. copy this screenshot into your weblog, so you can remember how you did this
  9. remove one file at a time using the rm command, take more screenshots

Ok, at this point, you can navigate around, login to remote computers, create and delete text files.

What's next?

Internet...

Module 3: Internet

Your computer needs 4 things to be able to get onto the internet:

IP address, example 10.14.8.4

Subnet mask, example 255.255.0.0

Gateway/router, example 10.14.0.1

Domain name server (DNS), example 10.9.250.13


Here's what each one does:

IP address:

All traffic on the internet or local area network (LAN) is in the form of packets of information, like mail envelopes with a letter inside. Each letter you mail has two important things: the address you want it to go to, and the message inside the envelope.

TCP/IP is the format of these, which stands for Transmission control protocol and internet protocol.

The TCP part is the message, and the IP part is the envelope, with an IP address on it.

Check the IP address of your machine:

From the GUI: open system preferences, network

From the terminal: type ifconfig


Subnet mask:

Imagine you want to stay in one of two large 254 room hotels. One has long hallways, and very few floors, the other has many floors, but short hallways.

If you want to sleep, you don't want many people walking down the hall in front of your room. You want many floors with fewer rooms per floors.

This is what subnet masking does on a network. Each of the four segments can hold 254 addresses.

At home, you probably have a network that looks like this:

IP: 192.168.1.49

mask: 255.255.255.0

router: 192.168.1.1

dns: 192.168.1.1


This means that the last zero can hold up to 254 addresses (from 192.168.1.1 to 192.168.1.254)

HPA has this sort of mask:

255.255.0.0

which means that

10.14.0.0

is the elab, which can have 254 x 254 addresses

It makes for a quieter network, also providing some security as others cannot see you easily.


Router/gateway:

This is the gateway for all of your traffic, usually the access point at your home. The technical difference between these words is that a router routes traffic between two networks of the same type (like ethernet), while a gateway is between different types of networks (like a cable modem or DSL gateway)


Domain name server:

This is the computer on your network or outside that translates names into numbers, like a digital phone book.

Try this in terminal:

nslookup physics.hpa.edu

  1. when you get the address, write it down
  2. open a browser
  3. go to physics.hpa.edu
  4. now go to the numbers you wrote down.
  5. Try this with another name, either on campus or off

Ping and traceroute:

Imagine you want to find out if a machine is responding (you can block this by using "stealth mode")

In terminal ping one of the IP addresses in your class

ping an address out on the internet

what is the difference?


now try this:

traceroute www.apple.com


It should give you a trace of the path your connection took.

Try this with other addresses on and off campus.


NSLOOKUP:

Say you want to find out the name of something, or the IP address from the name.

try this:

nslookup

(you will get a funny > sign)

type:

server 10.9.250.13

type:

physics.hpa.edu

what do you get?

where is this machine?

Try again using 8.8.8.8 as the server


The best use of this is to find out what OTHER people might call a machine.

We have several DNS servers on campus, the main one is at 10.9.250.13

Others to try:

4.4.4.4

8.8.8.8

10.14.1.2


you can get out by typing

exit

or control-z (halt)


Module 4: web server and web pages (html)

Creating a web page, installing a web server:

On the raspberry pi, run the following commands:

sudo apt-get update (this updates your computer)

sudo apt-get install apache2 -y (this installs apache web server on your computer, answering yes to all prompts)

Go your browser and enter 127.0.0.1 (which means "me" on the internet)

Now type ifconfig in your terminal and look for your internet address, which should start with 10.14.x.y

Look at this address using your browser

Editing web pages:

On the terminal, navigate to the following directory:

cd /var/www/html/

run the ls command, you should see a file called index.html

You can edit this, either by using the nano command (cooler) or a text editor (simpler)

sudo nano /var/www/html/index.html

This is a complex bit of html, so just look for something you recognize from the 127.0.0.1 test and change it

nano is a text editor, so ctrl-o means overwrite, and ctrl-x means exit

If you are using a text editor, it might not let you save.

Back to permissions----

type chmod 777 /var/www/html

which makes everything in the html directory read and writable to everyone (including you)

Making a new web page:

Using either nano or a text editor, create a new page:

sudo nano /var/www/html/test.html

You'll notice this is blank.

Add the following to your new web page:

<html>

<head>

test

</head>

<body>

Wow, this is really easy

</body>

</html>


remember to overwrite (ctrl-o) and exit (ctrl-x)

Now go to your browser and enter http://127.0.0.1/test.html


What do you see?


0 comments

SDR: Software defined radio

Download file "SDR radio notes.pdf"
Why SDR?
  • Most radios you use everyday are SDR, including your iPhone or android
  • Software defined radios rely on computing power instead of hardware, so the are more flexible, cheaper, and in some cases can handle complex encoded communications like cellular or digital communications
What is SDR?
  • First generation hardware defined radio is a method of transmitting information using electromagnetic radiation (EMR waves) through an antenna to space, then picked up by a receiving antenna as electrical and magnetic fields. The antenna is wired to a series of resistor/capacitor/inductor circuits to discern the information from the electrical pulses, then amplified for the listener. Your car radio or portable radio still use this technology.
  • SDR or software defined radio connects to the receiving antenna as above, but converts the electrical signals into digital ones and zeroes (1, 0), which can then be processed by a computer. Since the processing happens on a digital level, the power of the computer is the only limiting factor to the complexity of the signal processing.
Here's a comparison:
Top is a normal radio, note the parts:
The lower image is an SDR. Note that both have an antenna and some sort of basic amplifier to make the signals easy to process, but the SDR converts the analog signal to digital, using an A/D converter (analog to digital).
Why should I care?
If you learn about SDR, you can understand digital music production, wireless networks, space communications, telecommunications and much more...

How we will use it:
We have several very sensitive antennas each connected to an SDR converter on our IP computer network.
By using any of a number of SDR programs on your computer, you can connect to these SDR radios, and use them to receive programs from around the world, depending on which direction the sensitive directional antennas are pointing.
(You could also transmit using these antennas with an SDR transceiver, which is a receiver and transmitter in one)
Programs we will use: SDRdx, SDR#, Airspy
SDRdx:
Mac version:
Download file "SdrDx-AA7AS-Light.zip"
PC version:
Download file "SdrDxDist.zip"

How to use this:
First, the IP addresses, which often change:
10.14.4.77
10.14.4.78
10.14.4.75
10.14.4.35
10.14.4.26
Second, download the proper version (mac or pc) to your computer
On the mac, you might want to put this in your applications folder
To open, you may have to hold control while opening the SDRdx app in the folder

Here is a screenshot of what you will see when you open the app:
Lots here, don't be intimidated...
Look at the lower left for net:

Insert the IP address of one of the radios. Note: only one person can access each radio at the same time.
Look lower left for "SDR"
Make sure the GSP is either 200 or 190 kHz for our radios
Look upper left for "RUN"
You might want to click on "PAL" to make it color, but you should see something like this:

The sensitivity is done on the upper left, where it says: MAX dB
If it is all orange, adjust until you can see blue.
The frequency is selected by using either BC (broadcast) or AR (amateur) bands.
Try clicking through them, then clicking on the waterfall to hear the stations.

A guide:
Download file "SDRdx screens.png"


0 comments

ISR terminal commands

ISR terminal commands

———

review: ls, pwd, cd

nano, ctrl o, ctrl x

invisible files

top, ps

sudo

——

directory and processes:

mkdir, rmdir, cp, mv, rm

ps -ax | grep Terminal

ps -ax | grep Chess

kill -9 PID

———

network tools:

review: ping, traceroute, ifconfig

nslookup

tcpdump, wireshark

netstat

————

rPI tools:

sudo apt-get install wavemon

sudo apt-get install nmap

————

tcpdump:

ifconfig -a

on linux, look for eth0

on mac, look for en0

———

programs-osx

transmit

textwrangler

wireshark

omnigraffle

istumbler

nmap


module x: Navigation and files

pwd

ls -la

invisible files

cd

mkdir, rmdir

cp, mv

rm -frd

nano

textwrangler-next


Module 4: Wireless networking

mac wireless monitor

linux wavemon

scanners: active, mapping, passive


Module 5: html

where can I see it? safari, chrome, firefox, iceweasel

what does it mean?

how can I create it?

firefox tools inspector

WYSIWYG editors: itext express

text editors: textwrangler, bbedit (same thing now), subethaedit


module 6: Web server and html

apache installation

permissions, chmod

port forwarding


Module 7: cybersecurity


module: xml and data science


module y: Programs OSX

textwrangler

omnigraffle

transmit

istumbler

wireshark


module a: router setup

IP address, netmask

firewalls, NAT

QOS, traffic control

Synology packages


module 8: wireless networking


module 9: IPnet monitor


module: advanced html, css


0 comments

HW 9/1

Part one: Sensors and controls

  1. go to 10.14.17.1 and see if you can open something

Elab Louver

  1. go to 10.14.18.1 and do the same thing

Elab Window

  1. try again with 10.14.19.1, what do you find?

Elab fan

  1. go to 10.14.41.1 and look at the energy use in the elab, then turn on the hot tea water maker, which circuit is it on?

A Panel 1

  1. go to 10.14.62.x and check out the weather right now. What is a W/m2?

The generation of solar energy

  1. check out 10.14.8.10 to see the earthquake activity here

Part two:

  • go to 10.14.8.2

  • how much solar power is generated on campus?

  • 284 kilowatts per hour

  • how much is generated at the elab?

  • 17 megawatts per hour

  • how much is generated at the PPA array behind the elab?

  • 94 megawatts per hour

  • how much solar power is generated at each building?

  • Units: kw/hr

  • GCAC: use: 0 /generate 20

  • CLH: use 0/ generate 20

  • IT building: use 22, generate 20

  • Solar English building: 22

  • Solar dining hall: 24

  • how much is used at each location?

  • Units: kw/hr

  • Classroom C: 10

  • Tennis center: 14

  • Library: 6

  • Gym: 20

  • when is it used?

  • Most of the uses happen during the day after 8:30 when classes start

  • what does this tell you?

  • The school uses a lot of energy every day (especially places like the tennis center where people don’t know how to turn off their lights).

  • what dorm uses the most energy?

  • Perry-Fiske

  • when do the dorm lights “go off”?

  • From my experience is 10:30 for weekdays and 11 for weekends, but the graph shows that there are still some uses of the energy after lights off.

  • when is the use the least?

  • Carter Hall

0 comments

Elab Energy Hunt

Elab energy hunt-answers on your weblog!

Part one: Sensors and controls

  • go to 10.14.17.1 and see if you can open something
  • go to 10.14.18.1 and do the same thing
  • try again with 10.14.19.1, what do you find?
  • go to 10.14.41.1 and look at the energy use in the elab, then turn on the hot tea water maker, which circuit is it on?
  • go to 10.14.62.x and check out the weather right now. What is a W/m2?
  • check out 10.14.8.10 to see the earthquake activity here


Part two: egauges

  • Go to 10.14.8.1
  • check out the solar production in the elab, and all of the energy use
  • see if you can find the time you just turned on the hot water tea maker
  • see if you can find the time you turned on the fans (you may have to leave them on for a minute or two)
  • when did the wind turbine mysteriously come on recently?
  • is it working now?
  • go to 10.14.8.2
  • how much solar power is generated on campus?
  • how much is generated at the elab?
  • how much is generated at the PPA array behind the elab?
  • how much solar power is generated at each building?
  • how much is used at each location?
  • when is it used?
  • what does this tell you?
  • what dorm uses the most energy?
  • when do the dorm lights “go off”?
  • when is the use the least?
  • how could you tell a refrigerator from any other load?
  • what does a hot water heater look like?
  • what does a stove look like?
  • how could you detect an air conditioner that was left on all night?
  • which of the faculty cottages is using the most energy?
  • when does cottage 3 hot water heater timer go on?
  • when did they run out of hot water?
  • when did cottage 3 do some cooking?
  • compare these with cottage 7
  • what was the weather last Friday using the solar data?
  • when did it rain that day?


Part three: skyspark

  • go to skyspark.hpa.edu
  • login as guest/guest
  • check out buildings and users on the upper campus


Part four: elab2.hpa.edu

  • go to elab2.hpa.edu
  • login as isr/p——77
  • what was the lowest temp today and when?
  • what was the max power from the PPA panels today?
  • what was the max on the longest day of the year?
  • the shortest?
  • what is the usual campus energy use at night?
  • what time was someone working in the middle classrooms today?
  • what time was someone working in the monlab today?
  • when did the tennis center use the lights?
  • what was the weather that day?
  • when did someone use the microwave oven today for 2 minutes?
  • when do the security lights come on at the elab every night?


Part five: EMC server 5

  • go to 10.14.4.5
  • login as isr/p——77
  • click on “monitor”
  • hit “go”
  • use the checkboxes to select some items for comparison and graph (above)
  • play with the date and time selection to see more


Part six: Mango

  • go to 10.14.4.163
  • login as admin/admin
  • look for “data sources”
  • look at data points, and check some of the egauge values


Summary:

  • Which of the tools you used was the most interesting?
  • Which was the most accurate?
  • Which was the easiest to use?
  • Which would you use for an energy project?

0 comments

Solar PPA monitoring project

1. carefully measure a few sample solar panels on the PPA array above
2. determine a very accurate measure of the effective solar area of one panel, in m^2
3. count the panels, assuming all are working (some may not be, as you will find out elsewhere on campus, using something called TIGO)
4. measure the power output over regular intervals (e.g. no clouds)
5. compare with solar radiation over the same regular intervals (“shoulder” periods will be important here-ask about this)
6. calculate the efficiency of the system (should be under 20%)
7. compare efficiency with other time periods, e.g. years ago, or throughout a year (seasonal variation on solar incident angle).


0 comments

Mango challenge

Mango Challenges:

  • On server 10.14.4.123:8080 (204.130.155.61:8080)
  • Look for the data source “EG lab master”
  • You can also find this labeled “eGauge elab 2” on the server at
  • 67.53.209.186:8080 or
  • 10.14.4.163:8080 if you are on campus

Three clues will enable you to track and identify energy:

  • Time of day: When does it happen? Day or night? Weekends? Users?
  • Magnitude: how big is the impact in kW? What devices use how much power? All or part?
  • Profile: What is the shape of the use? Does it change at night? How does it start/stop?

If you have other data like weather, power factor you can go even deeper

Try these:

  • how much solar power is generated at each building?
  • how much is used at each location?
  • when?
  • what does this tell you?
  • what dorm uses the most energy?
  • when do the dorm lights “go off”?
  • when is the use the least?
  • how could you tell a refrigerator from any other load?
  • what does a hot water heater look like?
  • what does a stove look like?
  • how could you detect an air conditioner that was left on all night?
  • which of the faculty cottage complexes is using the most energy?
  • when does cottage 3 hot water heater timer go on?
  • when did they run out of hot water?
  • when did cottage 3 do some cooking?
  • compare these with cottage 7
  • what was the weather Wednesday 1.13, using the solar data?
  • when did it rain that day?
  • how do you know there is no water leak in carter dorm?
  • how much does it cost for the biggest energy users on campus? (use $0.40 per kWh)
  • how much money would we make if we sold all of our solar power in one day?
  • why do we still pay an electric bill?
  • the PPA array behind the elab is not owned by us, but we pay for the solar energy is harvests. How much money is the owner making if we pay $0.30 per kWh, whether we use it or give it away to HELCO?
  • why do we give it away to HELCO with no money back?

0 comments

ISR EMC Challenge!

ISR EMC challenge

  • What was the lowest temp today, and when?
  • If the PPA solar panels behind the elab are rated at 110 kW, what is their max power now?
  • What about in the longest day of the year?
  • How do you know there were no leaks in the carter water system back in 2020?
  • What was the hottest day last week? How hot?
  • What is the maximum difference in solar up/down temps for the cafeteria?
  • If you knew how much water was being pumped there, what else could you calculate?
  • What is the usual energy use for the campus at night?
  • What is the max use over the last week?
  • What time exactly does the carter hot water heater come on?
  • When does it go off?
  • Look at carter solar pump flow, and explain why it is active when it is
  • Of these rooms: main hall, conference room, office, classrooms or monlab, which has either no people in it, or the windows open?
  • When and at what time was I working in the project rooms last week?
  • When and at what time did I work in my office this week?
  • What was the highest outside temp this week, and when?
  • Look up the max solar radiation for the same times, how do they relate?
  • What day last week was clear, with no clouds all day?
  • How do you know there is a water leak at Perry Fiske west bathroom?
  • How big is it?
  • Is it hot water or cold water?
  • What could be the cause?
  • What is the max power harvested by the PPA solar panels above the elab and when?
  • If these panels are rated at 110 kW, how efficient are they now?
  • If you knew the area of the panels, and the solar radiation at any time, how would you calculate their true efficiency?
  • Since last weekend, when did the tennis center use their lights during the day?
  • How many hours is this?
  • Multiply hours by kW to get kWh
  • If each kWh costs the school $0.45 (45 cents), how much money did they waste using the lights during the day this week?
  • What day in June 2017 had the highest solar PV capture? How much?
  • What day in December 2017 had the lowest? How low?
  • What was the average for each of these?

Extra challenge:

  • When did I make tea recently at the elab? (hint: look up “elab breakers”)
  • What time did I cook lunch in the microwave then?
  • When did these happen last week?
  • When do the security lights come on at the elab every night?
  • How much energy do they use each day? (multiply hours by kW = kWh)
  • Which of the CO2 sensors in the elab is broken? How can you tell?
  • Energy Panels A handle huge things like air conditioning and hot water heating, how can you tell?
  • Which of the enphase solar panel arrays is the weakest? Why could this be?
  • The UPS system runs three plugs: which one uses the most, and why?


Mango Challenges:

On server 10.14.4.123:8080 (204.130.155.61:8080) login as isr

Look for the data source “EG lab master”

You can also find this labeled “eGauge elab 2” on the server at

67.53.209.186:8080 or

10.14.4.163:8080 if you are on campus


  • See if you can determine solar power generated at each location from power used by that location
  • Which of the faculty cottage complexes is using the most energy?
  • Look at cottage 3 today: when did the hot water heater come on? Why is this useful? How could you extend this information using mango?


Create one of each of these dashboards:

  • energy
  • water
  • air
  • weather
Next: eGauge native

0 comments

Telemetry notes: EMC and Mango

  • EMC 9 EMC v.4
  • 204.130.155.58
  • works for all cbw sensors
  • EMC 5 EMC v.4
  • 204.130.155.55
  • works for all cbw sensors
  • EMC 155 EMC v.6
  • 204.130.155.62
  • works for all cbw sensors
  • mango 163 mango v.3
  • 67.53.209.186:8080
  • best for egauges
  • mango 123 mango v.4
  • 204.130.155.61:8080
  • admin/admin

Timeline:

  • Intro/checkin
  • S2 project proposals
  • teams-diads (see below)
  • weblogs-screenshots, links
  • Overall plan: EMC and Mango telemetry systems
  • Why same, why different, why useful to whom
  • privacy issues: faculty cottages

M2M and IoT-the future

  • EMC intro
  • why-time, data evolution, changes made, financial decisions, “actionable intelligence”
  • what measured-anything by xml, many others, both telemetry (“far-measuring”) and control
  • xml vs. html-markup languages, both useful to interact with machines
  • data storage-mySQL: global, expansive, hard to manage, alternatives (noSQL, h2, MangoDB)
  • sample dashboard on 58 (elab 9)-Cade
  • monitor-all-look at various sensors
  • monitor, choose pair of sensors, graph
  • change date range
  • mango sensors-autopopulates

Sample metrics:

  • Energy
    • kW (power)-generation, use
    • kWh (energy)-generation, use, storage
    • voltage-AC/DC
    • current-amperes AC/DC
  • water
    • temp-tank, solar panel up/down
    • flow rate-pump, collection, irrigation
    • total amount-tank, leaks, users
    • tank level (using ultrasonics)
  • air
    • temp
    • rh
    • % CO2
    • air flow
  • weather
    • temp
    • wind speed/direction
    • RH
    • solar radiation
    • UV index
    • VOG levels
    • barometric pressure
  • HVAC
    • controls: temp, timers, occupancy sensors
    • sensors: integration with motion sensors, cameras
    • controls
  • xml commands-state.xml
  • Next steps:
  • IFTTT cloud based
  • mango server (cloud or local)
  • real time drone integration?


Teams:

ISR D

  • Cade-Eddie
  • Nic-Anuhea
  • Jared-Kyle
  • Alec
  • Will-Andy
  • ISR F
  • Pierce
  • Stefano
  • Nate
  • Ryan


0 comments

Cables and meters

Download file "cat5 cables.pdf"

0 comments

Weblog how-to

Team,
I've created weblogs for each of our new ISR folks, here is how to login and create your first page:
Start by going to http://physics.hpa.edu
You should see something like this:

Click on "student weblogs" near the top.
You should see something like this:


On the upper right, you should see something that says "go to my blog". Click on this.
You will see a login screen.
Your user name is last name_first initial, so Ella Finoe would be finoe_e
Bud Tuggly, would be tuggly_b
and so on...
Your password is the super secret wifi password at the elab. If you don't know it, I'll share it in class.
You will then see a screen asking you to create your first weblog.
Enter some basic stuff, like what projects you are considering this year.
We'll go over this in class, so relax if it does not work for you the first time.
Let me know how I can help.
aloha
b


0 comments

ISR 2020 begins!

Team,
We'll be going over your ideas for projects in the next few meetings, but in the meantime, have a look at this list and let me know if anything jumps out at you:

Project ideas:

  • Brain waves
  • Fabrication: 3D printing, CNC, laser cutting, design
  • Earthquakes/seismology
  • Radio/space weather
  • Virtual reality/augmented reality
  • Drones: mapping, visualization, sensors
  • Networking: wireless, security, servers
  • Arduino
  • Raspberry pi
  • Energy monitoring/telemetry
  • Environmental monitoring-classrooms
  • Computer repair
  • Aeronautics
  • Machine learning/artificial intelligence
  • Animation/blender
  • NASA projects
  • Home automation
  • EEG/EMG biofeedback
  • Astronomy/astrophysics
  • Acoustics


We may start off with some skills you will find useful, such as using a meter, making ethernet cables, and the various tools we have at the elab: 3d printer, laser cutter, CNC machine and others.
I also have a set of arduino and raspberry pi units for later on, depending on the direction we decide to take the class.
Don't worry about a proposal at this point, we'll discuss the process in our first meeting this week.
Let me know how I can help.
aloha
b

Breakout questions:

Powerful questions: introduce partner 3-4 minutes after breakout in pairs

  1. what is something no one in the class knows about your partner?
  2. what a theme or project you feel passionate about?
  3. what about that has you excited?
  4. imagine it is May, you have been wildly successful, what did they create?
  5. what is the impact your work has had on the community, the class, the world?
  6. what matters about this?
  7. what is important to you?

0 comments